Sunday, July 29, 2018

Love What You Do Tea Holder and DSP SALE

Love What You Do Tea Holder

All images © 1990-2016 Stampin’ Up!®
Supplies:
  • Stamp Sets – Love What You Do (148042); Make A Difference (146676)
  • Cardstock – Rich Razzleberry (115316); Basic Black (121045); Mint Macaron (138337); Whisper White (100730)
  • Stamp Pads – Tuxedo Black Memento (132708)
  • Misc. – 5/8” Whisper White Polka Dot Tulle Ribbon (146912); Stampin’ Blends Old Olive Light (144574) and Calypso Coral Light (144042); Share What You Love Specialty Designer Series Paper (146926); Tear and Tape Adhesive (138995); Stampin’ Dimensionals (104430)
Measurements:
  • Rich Razzleberry: 3-1/2” x 10-1/2” (score and fold at 3-1/2, 4, 7-1/2)
  • Basic Black: 3-1/4” x 3-1/2”
  • Mint Macaron: 3-1/8” x 3-1/8”
  • Whisper White: 3” x 1” plus scrap
  • Designer Series Paper: 3” x 3” (2 pieces, cut 1 in half diagonally)
  • Ribbon: 20”
Instructions:
  1. Cut the right hand side of the Rich Razzleberry diagonally so that it forms a pocket when folded. Adhere the bottom of the pocket using Tear and Tape Adhesive.
  2. Attach DSP to the inside pocket.
  3. Lay the ribbon across the outer front panel. Use dimensionals to layer the cardstock to the front panel, keeping the ribbon free.
  4. Stamp greeting on the Whisper White cardstock strip. Stamp the flower onto scrap cardstock and color with Stampin’ Blends or markers. Cut out the flowers and adhere with Stampin’ Dimensionals.
  5. Add the teabag and tie the ribbon closure.

If you would like to create this project, here's a list of the products you'll need to gather! If you click on the photos below, you will be directed to my online store: Shop with Debbie!

CLICK TO SHOP - Product List


SALE ENDS JULY 31st
Check the papers HERE!

Thanks for stopping by today! If you have any questions,
please contact me and I’d be happy to assist you!
Make something pretty and get inky! *hugs*

Friday, July 27, 2018

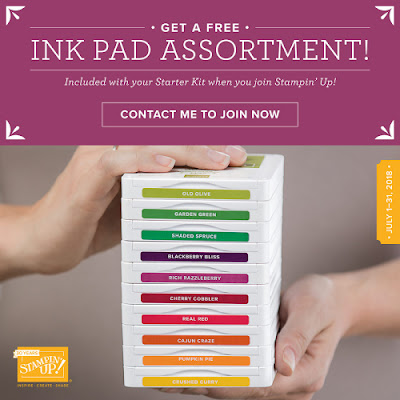
FREE INK PAD PROMOTION ENDING SOON!!

There are only a few days left to take advantage of the Joining Special for July. Don't miss out!


Yes, you read that right!! 
If you join the Stampin' Up! family of demonstrators in July, you will not only get $125 worth of products of your choice for just $99, but you also get to choose one of the sets of 10 Ink Pad Families for FREE!  
Until July 31st, you can join Stampin' Up! and get one of the color families of brand new ink pads
That is a $67.50 value!!
PLUS, you get FREE shipping ... another $19 savings!
By joining now ...
You get to see the holiday catalog during the sneak peak; 
AND pre-order on Aug 1st, plus you get 20% off All your orders!
AND you get me, to help you with questions and ideas for your stamping adventure!

That's a lot of ANDS!
ALL of this with no obligation. You do not need to hold workshops or parties. You can order for yourself and your friends. You will remain a demonstrator until January 31st.
After that, if you have not met the $300 quarterly minimum, you will just drop.  You still keep your kit.  No hassles!!

This is the best sign up deal Stampin' Up! has offered in a long time!

Come join my team!
Let me know if you have any questions.
Ready to Join?
Click HERE to go to my website and then click on the bar that says "Join Now"
Read and sign the Independent Demonstrator Agreement
Then, you will be prompted to choose $125 in products AND your choice of a color family of ink pads
Once you finish this part of signing, you will receive an email with instructions and links to sign into the Demonstrator Website where there is a wealth of information!
Again, I would LOVE to welcome you to my team and am at your fingertips (email/phone/text) for any help!

Tuesday, July 24, 2018

Paper Pumpkin: Blooming Savings for new subscribers!


If you haven't tried the Paper Pumpkin kit subscription, now is a great time to do so!  New subscribers get 50% off their first month when they subscribe using code BLOOM0818 HERE through August 10th!
Here are a couple video reveals of recent kits ... they're awesome!  And each comes with a stamp set and ink spot that you can use over and over even after the kit contents are gone.
JULY 2018 - Picnic Paradise


APRIL 2018 - YOU ARE MY ANCHOR
(If you are reading this blog post in an email, please click over to my blog to see the videos) 
Paper Pumpkin Summer Savings for new subscribers - 
click HERE to sign up!!

Thanks for stopping by today! If you have any questions,
please contact me and I’d be happy to assist you!
Make something pretty and get inky! *hugs*
Monday, July 23, 2018

Pop of Petals Project Sheet

This card uses the Tea Room Designer Series Paper.  
This is one of the 10 papers on sale this month.
Buy 3, Get 1 FREE
You can check them all out HERE.


Pop of Petals

All images © 1990-2018Stampin’ Up!®

Supplies:
  • Stamp Sets– Pop of Petals Bundle (cm-148385), (wm-148384); Detailed with Love Stamp Set (cm-146606), (wm-146603)
  • Cardstock – Poppy Parade (119793); Petal Pink (146985); Very Vanilla (101650); Garden Green (102584)
  • Stamp Pads– Poppy Parade (147050); Garden Green (126973)
  • Misc. – Tea Room Designer Series Paper (DSP) (146894); Subtles Markers (147156); Rhinestone Basic Jewels (144220); Snail Adhesive (104332), Stampin’ Dimensionals (104430)
Measurements:
  • Poppy Parade: 8-1/2” x 5-1/2” (scored at 4-1/4);  4” x 2-1/2”
  • Very Vanilla: 5-1/4” x 4” (for inside card)
  • Petal Pink: 3-3/4” x 2-1/4”;  3” x 2” ( for punching)
  • Garden Green: 2-1/2” x 2” scrap
  • Tea Room DSP: 4” x 1-1/2”—2 pieces
Instructions:
  1. Fold Poppy Parade cardstock in half and crease with bone folder to form card base. Stamp the flower image in Poppy Parade ink in the corner of the Very Vanilla cardstock panel; adhere to inside of card with Snail. Adhere DSP to top and bottom of card front with Snail. 
  2. Stamp greeting in lower right corner of 3-3/4” x 2-1/4” Petal Pink cardstock with Poppy Parade ink. Now Stamp the flower in the upper left hand corner with Poppy Parade ink; stamp again in upper right corner as shown without re-inking stamp. Stamp the same flower with the same ink on smaller piece of Petal Pink, once with full strength ink and once again without re-inking. Punch out these flowers. Color center of flowers with Petal Pink Stampin’ Write Marker.
  3. Stamp the other more solid flower with Garden Green ink on Garden Green cardstock scrap and punch out. Trim off 2 petals to use as leaves.
  4. Now you are ready to assemble. Layer Petal Pink panel to Poppy Parade panel and adhere with Snail. Attach to center of card front with Stampin’ Dimensionals. Adhere punched out flowers with Stampin’ Dimensionals over stamped flowers and put rhinestone in center of each. Put a little Snail on the back of your leaves and tuck them under the flowers. 
If you would like to create this project, here's a list of the products you'll need to gather! If you click on the photos below, you will be directed to my online store: Shop with Debbie!

CLICK TO SHOP - Product List
Garden Green Classic Stampin' Pad
[126973]

Thanks for stopping by today! If you have any questions, please contact me and I’d be happy to assist you!
Make something pretty and get inky! *hugs*

Sunday, July 22, 2018

Time to Stock Up! Buy 3, Get 1 Free Designer Paper is on NOW!


Do you love patterned paper? Do you have a tendancy to collect and hoard instead of use, because you don’t want to use it up? ðŸ™‚ I totally know the feeling!
Well, now is the perfect time to stock up on your favorite designs so you can feel good about cutting into those pretty pretty patterns!

Buy 3 Get 1 Free Designer Paper Sale


Now through the end of July, you can pick from the following patterned papers and once you’ve put 3 packs in your shopping cart – you get to add a 4th one for FREE!  So, which one is your favorite?  I can’t decide between Tranquil Textures and Petal Promenade!

Animal Expedition (12 sheets; 12 x 12; #146902)


Best Route (12 sheets; 12 x 12; #146897)


Garden Impressions (48 sheets; 6 x 6; #146289)


Nature's Poem (12 sheets; 12 x 12; #146338)


Petal Promenade (12 sheets; 12 x 12; #146913)


Tranquil Textures (12 sheets; 12 x 12; #146331)


Tropical Escape (48 sheets; 6 x 6; #146916)


Twinkle Twinkle (12 sheets; 12 x 12; #146284)


Under the Mistletoe (12 sheets; 12 x 12; #146921)


Wood Textures (48 sheets; 6 x 6; #144177)

Don’t forget! You can mix and match – Get 2 of one style – 1 of another style – and 1 of a 3rd style.  Or all 4 of the same pack, you decide!  And, there is NO limit!!

Thanks for stopping by today! If you have any questions, please contact me and I’d be happy to assist you!
Make something pretty and get inky! *hugs*